Tuesday, 26 March 2019

Knitting to ease the stiffness in our hands.

When we do applique, stitching by hand sometimes we keep out fingers, hands in the same position while holding our fabric and needles to stitch and sew.  This can cause them to become stiff.  Kate recommended I try some knitting, as the hands and fingers are moving more often.  I am not very good at knitting, decided to give it a try.  This is the result and the biggest bonus of it all, my hands are not sore, the stiffness is gone.  So now I knit a bit every day!
 Supplies + Pattern. 
 I have stitch markers in my sewing room, just could not find them. So I improvised, with little scrunchies, which is used on my machine bobbins. my row counter, which I was gifted with a collection of knitting needles.
 The increase on this, stumped me.  My way would not have been good, stopped at the yarn store.  BettyAnn showed me how.  I was on my way.
 Remind me of an aeroplane, with wings.
 The body almost done.
 Knitted. Still needs blocking and ends sewn in.
The buttons, including some new born mittens (which somehow came out much larger). Only a beginner at this knitting.  The next sweater is well on its way.  The pink one will be going to a baby girl, arriving this summer.


Thursday, 21 March 2019

Stitching DIY.


We all have our own way of doing things.   At the beginning of this year, my honest list had my oldest work in progress on it, a cross-stitch kit.  Decided as the paper pattern is falling apart on the folds, have to get this one done.  To this end,  it gets worked on at least once a week. Opening Pandora's box, without realizing it. Since then the stitching bug caught again. Inspiration is close by as, Diane stitches all the time.
This is her progress on her latest piece, Jane Bannister.
 Kits come with pre-cut floss, our muscles and brain gets use to this.  So when I decided to start a new piece, something was missing.  Until it dawned on me, the floss needs to be that magic length!
 As this was a 2018 stitch-a-long, going online to check out the layout was a good idea.  As the patterns we buy, was for individual blocks only.  This gave the answer, as to how to connect the blocks of the months. Very good to do research, before starting a project.
 Prepping the fabric first, serge or zigzag the edge of the fabric.
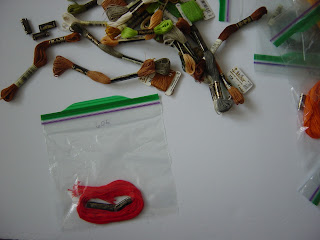
These are my little tools to help me.  The magnifying glass, came from a Christmas Cracker, little zip lock bags with the corresponding symbol on the outside of the bag for short pieces of floss, just in case they are needed later.  A sharpie to write on the bags, a pencil for colouring in the parts I have stitched on the chart and a small pair of sharp scissors.  The other thing I use, is a black fabric bag, to place on my lap while stitching, it helps me to see the holes on the fabric so much better.  It works similar to when one use dark fabric, by placing a white fabric on your lap to reflect the light up. Making the holes easier to see.
 Getting all the supplies together.
 Prepping the floss.
 Using sandwich zip lock bags.
 Write the number on the outside of the bag with a sharpie.
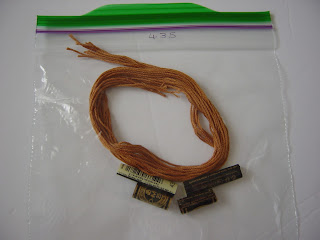
 Cut the floss the length, in this case it turned out to be 26 inches.
 Place the floss and the tags from the thread in the zip lock bag, ready for use.
 It is almost ready, just remember to close the bag.  Place it in your project bag, it is now ready for you, when you want to work on your project.
A small start has been made.
Spring arrived yesterday, so glad it is official.

Tuesday, 12 March 2019

Baby girl quilt.

Making a soft machine embroidered quilt, can be tricky.  Especially if the embroidery is very dense.  One would need many layers of stabilizer, to prevent the embroidery from puckering around the edges of the design.  To avoid hours of removing lots of stabilizer from the back, it is much easier to use, a thin layer of bamboo batting and one layer of stabilizer on the back.  The stablizer can be removed relatively easy and the bamboo batting ensure the quilt is soft, without all the stabilizer.
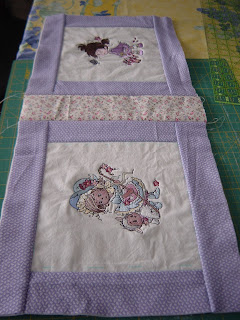
Every piece of fabric is backed with a piece of bamboo batting for assembly of the quilt top. The top is assembled, the same way one would sew the quilt top normally.  Except for the strips of fabric, around each embroidered design.  These are pieced as, quilt as you go.
First draw a square block on the muslin around the design.  Next draw two lines, a quarter inch and a half an inch from the border of the block.  The middle line is the stitching line, the line on the outside, closest to the edge of the fabric, is the line, against which one line up the edge of the fabric strip.  Now sew a seam on the middle line, using a quarter inch foot.
Do both sides of the square first. Next, trim the excess muslin along these sides.
It will look like this.  Then fold the fabric strips towards the outside edge of the batting.
This helps to block the embroidery design and provides stability later on for the quilting process.
Then repeat the process for the top and the bottom of the block.
Pinning everything on a flat surface helps to keep it all in a straight line.
Sew these strips in place with a quarter inch seam allowance.
Once the top and bottom strips are sewn on, fold them back and trim the blocks to the size you want.
When the blocks are all done, the quilt is ready for the sashing strips to connect the blocks.
First connecting the blocks into strips of fabric.
The back of a strip of blocks.
The front of a strip of blocks.
 Then sew the sashings in between the rows, from the top to the bottom row.
This creates the center panel of the quilt.
Next add the side borders.
Then the top and bottom border strips, to complete the quilt top.
The back of top will look like this.
It is now ready to be sandwiched, the regular way, with batting in the middle and a backing on the back.  This very thin bamboo batting is too thin to quilt, without batting.
Now it can be quilted.  Once washed, the quilt will be soft, ready for a baby to enjoy.


Thursday, 7 March 2019

Working on the secret project.


The secret project this week, is all about embroidery.  Not hand embroidery, but machine embroidery.  With clearing all the ice outside, my wrist is not happy and needs to have a rest,  for a bit.  Have stitched these designs so far, a few more to go.  They will be used to create a very special baby quilt, for a little girl.
 Snowflake.
 Lullaby.
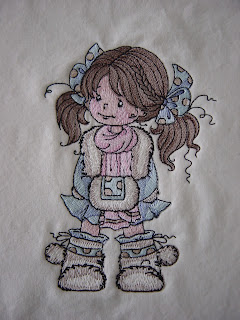
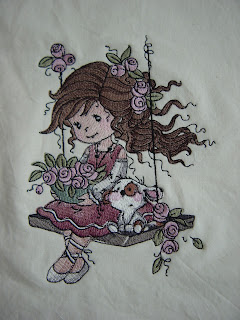
Mistletoe, all done on cream muslin. Instead of using lots of stabilizer to stitch on, it has been replaced with a very thin bamboo batting and one thin layer of stabilizer.  All the designs are stitched with Marathon 40 weight rayon thread.
Last summer in Abbotsford, this panel followed me home.  It is now a baby quilt, ready to be given to a new baby. The border fabric came in a kit for another panel, which was never used for it.  The binding is leftover, from a previous project.  Using everything, not wasting it.
Jane Bannister1855,  Diane has started a new piece.
 Anna made a T-shirt quilt.  She long arm quilted it.  What a wonderful way to use the T-shirts, in such a meaningful way.
Have a wonderful week, stay warm and toasty inside!