The Hertfordshire Quilt
One border is done, three more to go.
Finding the Way: Foundation Piecing.
The diamond border around the center, created a foundation pattern for piecing this round.
Two sides sewn on to the center diamond.
All the excess fabric trimmed up to this point. Ready to add the last two corner pieces.
The stitch length on the machine is set quite tight, this helps to remove the paper easy.
From the front before trimming the excess fabric.
Lining up the ruler before trimming.
Once the fabric is trimmed on the border
The front will look like this.
Next step is to trim the excess fabric away, underneath the corner triangle.
This removes the bulk of the fabric. Creating a neat and tidy block.
This is what it will look like.
A finished block.
Removing the paper, just fold back to the stitched seam, then peel the paper of.
Starting on the outside and working towards the center.
The back and the front, with all the paper removed, ready to be used.
Linen and Threads 2018 stitch-a-long.
She recommended a different needle for stitching, a tapestry needle, it worked.
This is my progress so far.
The center square of the quilt, it has a mitered borders. This piece of brown fabric is very apt, it takes a village...
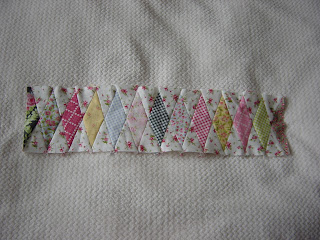
All the diamonds are made, next step sewing them into border strips and adding them to the center medallion above.
Diamond strip borders all sewn.
Border strips ready for the next step.
Get better soon, Lynn!


so pretty!! we are at the same stage of Hertfordshire - I am doing these borders EPP the machine is too busy with other things - nice weather here! sorry your winter is hanging on
ReplyDeleteNice tutorial on how to do those diamonds. What is that gorgeous flower in your first photo? A dahlia? Never have seen one with those two colors. Gorgeous!
ReplyDelete