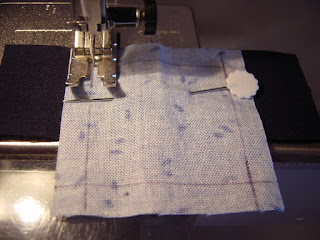
Step 1. Draw a square, a quarter inch line from the edge of the square, on the the back of the fabric.
Step 2. Place square on a strip of fabric, right sides facing each other.
Step 3. Start stitching on the edge of the fabric, at a 90 degree angle.
Step 4. Pivot 90 degrees, when you reach the spot where the two drawn lines cross each other.
Step 5. Stitch along this line, until you reach the spot where the lines cross each other again.
Step 6. Stop and pivot the stitch direction 90 degrees, then stitch towards the edge of the fabric.
Step 7. Continue with the same steps as above, attach the opposite strip first.
The back of the work.
It should look like this.
Step 8. Fold the two side strips away from the square, before attaching the next two strips. Take care, stop at the corner, making sure not to stitch past this point.
Step 9. Carefully move the excess fabric out the way, while stitching on the remaining strips.
Step 10. Draw a 45 degree angle line from the corner as shown. Pin the strips together, then stitch to the
corner of the drawn square.
Step 11. Back stitch away from the corner. Do not stitch past this point. Do all four corners.
Peek to make sure there isn't a hole or bubble at this point.
This is what it will look like.
Step 12. Trim the excess fabric from the mitred corners.
Step 13. Iron the square, it will look like this from the back.


The extra step I add: 11a Peek to make sure there isn't a hole or a bubble at the join point. :-)
ReplyDelete