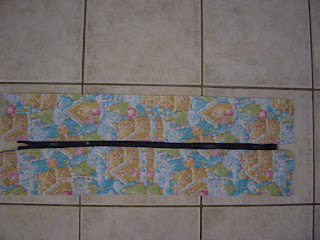
Sunday, 30 April 2017

Quilt Pattern Deconstruction.


Sometimes time is of the essence and we need to make a quilt in a short period of time.  Instead of following the pattern, take a step back and see if it can still be constructed and look the same, with a more streamlined pattern.

Using the printed pattern:


When one deconstruct a pattern, can a row of squares be converted to a rectangle?  Taking the pattern row by row, break it down into segments, creating less squares and creating rectangles can greatly reduce cutting and assembly time on a project.
 Spending time with pen and paper, may take a little bit of time upfront, it also helps with the planning of the project.  If there are any mistakes in the pattern, you will discover them.  You can make note of them and make corrections before you start to cut any fabric.
Once you have done all this on paper, remember to include your seam allowances before cutting out, when doing this.  A quarter inch for each seam, for each piece.

 Your cutting guide for your fabrics will change as well.  The amount of fabric you will use, will stay the same.
 With this pattern, the amount of squares was reduced.  The rest of the cutting stayed the same.
One must create a new cutting guide for the background and the colours in this quilt.
 This will make cutting out a breeze.  Keep the colour sequence the same as on the original pattern chart. This is a free pattern, from Lecein.
Also number the rows, lay them out in order and sew them together, row by row, as you complete the rows. This keeps the construction of the top simple.
 The Front of the finished top.
The Back of the finished top.
The outcome is the same.  The quilt will look the same, the process to construct the quilt top is simply made with less pieces in a shorter period of time.

Kits are available at The Sewing Cafe.

Wednesday, 26 April 2017

Reducing the scraps and stash busting

Reducing the scraps and stash busting is high on my list this year.  To this end, for gifts, patterns was placed on my list.  I received a few, they will be becoming my projects to work on for the next while.  They are all machine pieced and they will hopefully make a dent in my fabric collection.
 This quilt was at Quilt Canada 2016. 
 Then I found the pattern. It is a Sue Garman one, Ancient Stars.
It was put on my list of patterns I wanted for my gift list.  I received it as one of my gifts.  It will be used to reduce my fabric collection.

 These three patterns is part of my quest to sew up all the bits of fabric which are filling up nooks and crannies of space in my sewing room.  At the end hopefully they will all be quilts and not scraps of fabrics anymore.
 
Art work by my two favourite girls, they are twins who love art.


Thursday, 13 April 2017

Easter


We all love Easter.  We know Spring has finally arrived and everyone is just that much happier!  They smile more and all the colours are bright.  The kids love it, as they know they get chocolate.  It is a time for families to come together and celebrate Easter.
This was a new project.
The original pattern had too many pieces, for the time I wanted to make it in, so I modified it to accommodate my needs (more about this at a later date).
Going for a walk, many families will be out and about this weekend, doing just that.  Saw these wild turkeys strolling across the road yesterday.
One do not normally see this, so it was rare indeed!
This one's expression says it all: Am I going to be Dinner? .....(wrong season, Fall is six months away)

The rag quilt has all its sandwiches quilted and ready to be sewn together.
The pink and white ones.
This rick rack print ties all the colours together.

Love Entwined, lots of flowers have been added to all the four vase locks.
 
  
Have a wonderful Easter, for those who get to spend time together, enjoy those precious moments spent with the special people in your life.

                                         .....for the kids, let the easter egg hunt begin...

Tuesday, 4 April 2017

Spring is here!


In our family quite a few members enjoy bird photography.  These of the Blue Jays are beautiful.  As soon as Spring arrive, they come calling for their peanuts, the ones in the shells, they love.
 Made this bag, it has to be sturdy.  The blue plaid fabric is strong and durable.

This is the layout for a rag quilt.  All the edges will be raw, after a few washes, it gets a chenille edge to it, making it soft.
I had a request for a piece of Batik fabric, so purple it will be.
Love Entwined has been packed away for a while, until I found the right fabric to do these eight leaves next to the vase.  Turns out, it was already in my stash.  This came from the backing fabric I had bought a while back for this quilt.  Luckily I got extra, so now it is coming in handy!

101 Bag making.

Thirty years ago, I discovered quilted bags.  I made the first one as per the pattern instructions.  From then on, I changed it and created a much smoother and simpler pattern.  Here is my quick bag pattern.

Take a piece of quilted fabric, or quilt your own.  Using the three measurements: Height, Width and Length, to create the size of the bag you wish to make.  Use this to draw the cross on the fabric, then cut it out.
Next fold in half, pin to mark these points on either side.
Then fold the middle up to the sides, to create the quarter marks.

The pins in place.
Pin both sides.
These are the guides for the bag handles.
The bag handles pinned in place.
The top of the bag, with the zipper stitched in place.
The inside of the bag. This is a great way to use up Christmas fabric.
The bag with the handles, stitched in place.
The top detail of the handle.  This is both decorative and to anchor the handles in place.
The side of the bag.
Next, find the middle of the top zipper section.  This will be the point to match to the top of the bag.

Make sure to pin the handles on to the main body of the bag, to prevent from accidentally stitching the handles down in the side seams of the bag.
Pin the zipper section from the middle, out towards the sides of the bag.

 Stitch the zipper section to the top of the bag.
Make sure to start a quarter of an inch from the side and stopping a quarter of an inch before the edge of the fabric.  This is to make the turning of the  top corners of the bag easier.
(Do both the top seams of the bag the same way.)
Working on the inside of the bag to stitch all the seams of the bag, creating a rectangular box shape.
Matching the other seam at the top. Using the center marks to match the points.

The top seams stitched to the zipper section.
Next step, join the side of the zipper section, to the top side of the sides of the bag.
 Once stitched together, edge the raw seams.

The bag will look like this, the section will be slightly longer. (If you want it to fit perfectly, make the side section shorter, before attaching it to the side section of the zipper piece.)  Continue if you want the overlap.
Now pin from the bottom of the bag, to about this point.
Next pin from the top down. This will create the overlap.
Pin in place.  Make sure to leave the zipper unzipped for a section, this is required to turn the bag inside out, once the side seams are stitched.
Do all four side seams.  Stitch in place, edge the raw edges.  Now turn the bag inside out.
The finished bag.
Enjoy!