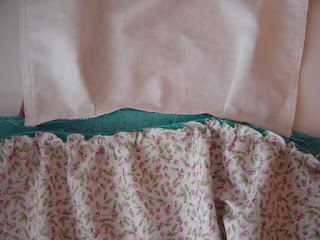
Attaching the skirt.
Use the longest straight stitch on your sewing machine and stitch a row along the top of the skirt, about a half an inch from the edge. This is the gathering threads, to gather the top of the skirt.
Use a pin to anchor one end of the gathering threads. This will prevent pulling the gathering threads out.
Spread the gathers evenly, before pinning to the waistband.
Next stitch in place, to attach the skirt to the waistband.
It will look like this on the back.
On the front it should look like this.
Now it is ready for the Bib to be attached to the waistband.
Find the center of the waistband and the center of the bottom of the bib. Pin together.
Stitch together.
The apron, so far.
Attach the waist ties, to the waistband.
Then attach the lining of the waistband at the back. Start at the sides, covering the waist ties and the top edge of the band where the bib is attached. It will create a upside down U- shape.
It will look like this. Here you can reinforce the waist ties, stitching a couple of extra rows in place.
The wrong side of the waistband. The bib is sandwiched between the two layers of the waistband.
Now fold the waistband over.
Pin the waistband.
Stitch it.
The apron is completed.


A cute little apron, just right for a new bride.
ReplyDelete