Wednesday, 27 January 2016

The List?


Everyone has one, be it on paper or in their heads.  All the goals for the year is on it.  Finding time to do the things on the list , requires focus and setting aside time to work on all these projects.  Quilters call their projects UFO's.  However, we should call them WIP's (works in progress).  Every aspect of our lives, are just as important and deserve the same attention to detail, as a treasured project.  Be it a test we have to study for,  our health or the time we spent to take care of our loved ones.  So with in mind, it is crucial to get the balance and the quality right, practice makes perfect?  So making time for everything, on a regular basis helps to do so, with less stress and a much happier outcome!

On the list is going for a walk every day, it is a deposit in our health investment to ourselves.  Eating a healthy diet is another.  All those WIP's deserve their daily dose too.  How many finishes we end up with at the end of year would be telling, doing twenty five minutes a day for a year.  Just think of how many new projects we can start?

Dear Jane.....

Made a few of the blocks, then I remembered something important.  This is another Jelly Roll I got around the same time as I got all the other ones which bled.  Before cutting anymore blocks, these strips of fabric will need to be washed.  Pre-cuts need to be washed as well.  Did not bother with the last four Jelly Rolls, now it means a king size quilt will have to be unpicked, because of it.  It is hand quilted, too large to just wash and fix the problem.  Something else for the list.
My hexie project, it is where I want it to be for now.  It is up to date.  Another leftover project, it uses one and a half inch squares, which gets folded over the hexagon shape, then tacked and English pieced into the larger project.
Time to use modern gadgets to help with creating quilting treasures.  Accuquilt dies can be very helpful, when cutting lots of leaves, berries and strips of fabric.
Our cat sleeps with her back paws in the most creative ways...


Friday, 22 January 2016

The Little French Apron, part 1.

A request for this iconic apron came just before Christmas.  It needed to be functional and girly, with all the bells and whistles, for a newlywed bride.  She loves to bake.  It had to be a modern take on an old classic.


The Bib.
 The front, with something modern on the bib.
 This is a take on kneading dough.
The rick rack to cover the raw edges and decorate the front.  This is where a pocket could be sewn on the bib of the apron.
Make the ties, here is a quick way to make them...
 Pin ties in place.
Pin lining to the front, then stitch the two together, leaving the bottom open, for turning inside out.
The two stitched together.
The right side.
The edges top stitched an eight of an inch from the edge.
 Rick rack sewn close to the edge on the front, to finish it.
Adding the two tucks.  The bib is now ready to attached to the waistband.

 to be continued.....


The French Apron, part 2.


The Skirt.

It had to be flirty, with the frills, but without all the gathering in the skirt.  Baking in the kitchen,  one want to stay comfortable.  Enjoy and have fun, while baking cupcakes and everything else.

A modern take on an the skirt.

It has three tiers, strips cut on the bias for a better drape, edged with bias tape and gathered slightly at the top.
Attaching one tier, onto the next.  Mark a line one inch from the bottom edge, on the wrong side of the next tier.  Pin in place and stitch down, to attach the two tiers.
 This is what is should look like.
Before the binding is attached.
 With the binding.
The front.
The back.

 Attach the next tier, to create the skirt.
Next step, attaching the skirt to waistband.


The Little French Apron, part 3.

The Waistband.

Attaching the skirt.

Use the longest straight stitch on your sewing machine and stitch a row along the top of the skirt, about a half an inch from the edge. This is the gathering threads, to gather the top of the skirt.
 Use a pin to anchor one end of the gathering threads.  This will prevent pulling the gathering threads out.
Spread the gathers evenly, before pinning to the waistband.
Next stitch in place, to attach the skirt to the waistband.
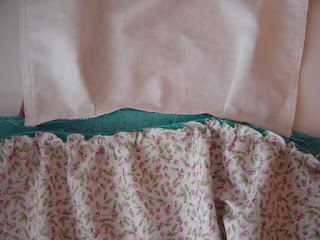
 It will look like this on the back.
On the front it should look like this.

Now it is ready for the Bib to be attached to the waistband.

 Find the center of the waistband and the center of the bottom of the bib.  Pin together.
 Stitch together.
The apron, so far.
Attach the waist ties, to the waistband.
Then attach the lining of the waistband at the back.  Start at the sides, covering the waist ties and the top edge of the band where the bib is attached.  It will create a upside down U- shape.
It will look like this.  Here you can reinforce the waist ties, stitching a couple of extra rows in place.
The wrong side of the waistband.  The bib is sandwiched between the two layers of the waistband.

Next step.  Take it to the ironing board and turn up the bottom hem and iron a seam about a quarter of an inch along this edge.
 Now fold the waistband over.
Iron it flat.
 Pin the waistband.
Stitch it.
 Attach pockets.
The apron is completed.

I knead U

Copyright belongs to : Cheerfulchickadee.blogspot.com for this original phrase.

Saturday, 16 January 2016

Twelve days of Christmas and more.

This quilt was our Mayflower  project for a year.  Every year a new quilt or challenge is chosen, then everyone use the same pattern (which they buy), with their own fabric choices.  Unless there was a specific piece of challenge fabric we had to incorporate.  Mine was inspired by the silky Christmas balls which we hang on the tree every year. The  hand dyed fabrics are all from South Africa, they are called : Amafu.  The fabrics are colour fast and a joy to work with.

Clutter ways us down, with new years resolutions to keep it all simple. So with this in mind,  the leftovers presented a problem: What to do with them?  The answer came sooner than I expected.  Bernina had issued a bag challenge, so we all decided to make bags.
The front of the bag.
Creating the canvas for the bag.  Sewing together all the scraps at random, then using only one decorative stitch in one colour to decorate the crazy patch design.
The Gusset for the bag.
All the scraps was sewn on a foundation fabric.  Later the pattern pieces was pinned to these newly created fabrics, then cut according to the pattern pieces,  to create the bag.
The back of the bag.
Lining the bag with some of the leftover border fabric.  Perfect for the beach.
At the end of this project, all the scraps was used to create the bag.  The leftovers was all used up. Neat!
First attempt at painting a landscape painting with acrylic paint.
Dreaming of the green trees in summer, winter has arrived with a blast.