Tuesday, 5 April 2016

Gremlins and knitting?


The weather our side has been all over the place.  Spring is officially here, yet nothing seems to be following a normal pattern.  Since the mini ice storm, we have had lots of rain, it resulted in the stream/river over flowing its banks.  Then just when we thought nothing could top that, we had snow.
 The stream is normally about ten meters wide, now we cannot see the other river bank.
 Our cat was not amused by the snow, she has cabin fever and is ready to brave the cold, to get outside!

It was time to pull out my knitting, it has been a while.  When It was all laid out flat, I noticed something, two repeats down, the work seem to be unravelling...  A gremlin had crept in.  The only way to make sure it is gone, is to start over.  My bamboo yarn will be turned into a ball of yarn.  Knitting is something some seem to have a natural ability, while for the rest of us it is an acquired skill, which takes time and effort.
 A drop stitch?  From a yarn over...

The Bargello quilt, which has kept me busy the past week, has the center done.  The magic of it is all in the way the seams interlock.

The back looks like this:

The front like this:

The borders will go on next.  It will be a striking green first.
The fabric with O Canada.

 The next border is a fabric with the words of the Canadian National Anthem on it, O Canada.  It is number one of my twenty fabrics.  When the sewing room got tidied up, it was moved, so it will be interesting to see where I put it.  (It took a bit of hunting, just a few shelves from where it was kept all along.)

Scraps of fabric was placed in a pile, which was cut into apple core pieces to create a baby quilt top.  It will be finished and given to a new mum.

The weir is no longer visible.
Spring cleaning is about to start our side.  So everything else will have to wait until this is done.


Friday, 25 March 2016

Spring? Winter?.....

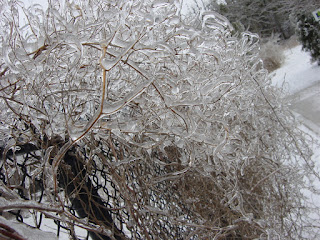
We had a mini ice storm the last couple of days.  Making us wonder where Spring went.....It looked as if Winter was coming back!
 This fence was just covered in ice, including the plants covering it.
 The top of the fence, decorated with a thick layer of ice.
The big trees was struggling with all the ice, many branches was just snapping off, under the weight of the ice.
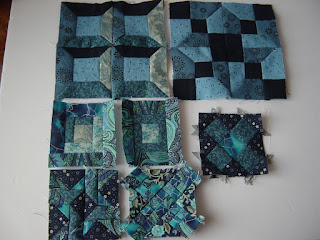
The Splendid Sampler:
 The latest block.

365 Challenge:
Love Entwined:
Falling ice chips from the trees.
When the sunlight hits the ice, it sparkles!

Wednesday, 23 March 2016

Ice Bells.

 Walking along the stream, these branches had little ice bells hanging from them.  The sunlight caught them and they sparkled, swaying in the breeze.
The Splendid Sampler:
This block is done.
This one is in the process, life has been busy in our parts of the woods.
Embroidery in chain stitch, to give the look of crochet.  Stem stitch which has been whipped on top, which looks as if it is crochet cotton.

The 365 Challenge:


More blocks done.  Will square them off, once the center is sewn together.
The Salmon in the stream is back.  The journey they have to follow to get here, is just amazing.

Easy Mitre Tutorial:


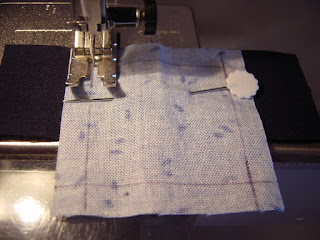
Step 1. Draw a square, a quarter inch line from the edge of the square, on the  the back of the fabric.
 Step 2. Place square on a strip of fabric, right sides facing each other.
Step 3. Start stitching on the edge of the fabric, at a 90 degree angle.
Step 4. Pivot 90 degrees, when you reach the spot where the two drawn lines cross each other.
 Step 5.  Stitch along this line, until you reach the spot where the lines cross each other again.
 Step 6. Stop and pivot the stitch direction 90 degrees, then stitch towards the edge of the fabric.
This is what it will look like on the back of the work.  An upside down U-shape.
Step 7.  Continue with the same steps as above, attach the opposite strip first.
The back of the work.
 It should look like this.
Step 8. Fold the two side strips away from the square, before attaching the next two strips. Take care, stop at the corner, making sure not to stitch past this point.

Step 9.  Carefully move the excess fabric out the way, while stitching on the remaining strips.


Step 10.  Draw a 45 degree angle line from the corner as shown.  Pin the strips together, then stitch to the
               corner of the drawn square.

 Step 11.  Back stitch away from the corner.  Do not stitch past this point.  Do all four corners.
Peek to make sure there isn't a hole or bubble at this point.
 This is what it will look like.
Step 12.  Trim the excess fabric from the mitred corners.
 Step 13.  Iron the square, it will look like this from the back.
It will look like this on the front.